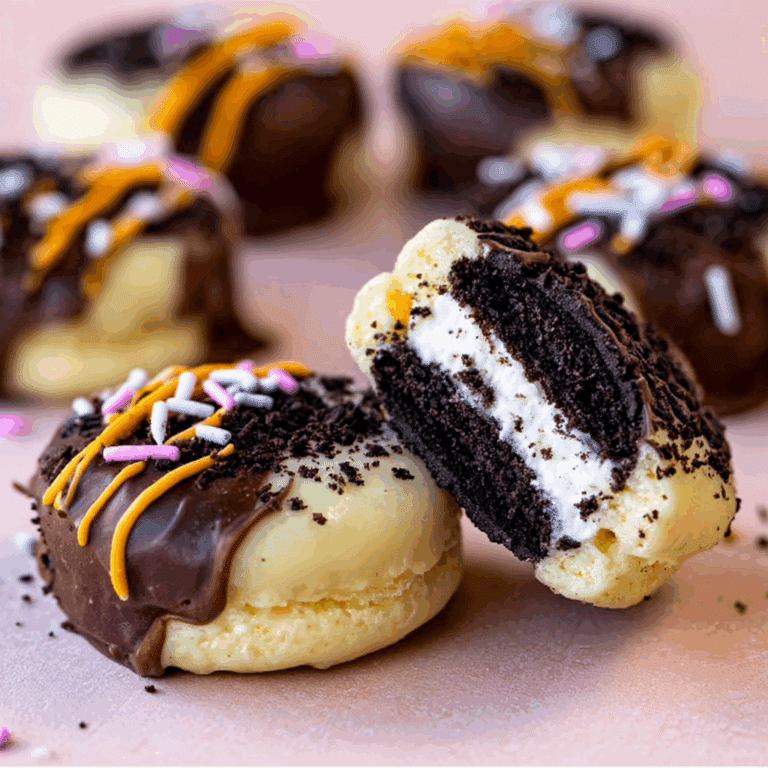
How to Make Chocolate Covered Easter Oreos

If you’re searching for a fun, festive, and absolutely delicious treat to celebrate the season, look no further than Chocolate Covered Easter Oreos! This delightful twist on a classic cookie combines creamy chocolate and colorful Easter-themed touches for a sweet treat that’s perfect for parties, gifting, or simply indulging your chocolate cravings. Whether you’re an expert baker or a beginner in the kitchen, making these goodies is easy, satisfying, and sure to bring smiles all around.
Why You’ll Love This Recipe
- Simple Ingredients: Uses basic pantry staples and classic Oreos, making it perfect for quick preparation.
- Customizable Fun: Easily adapt with different chocolate colors and toppings to match your festive vibe.
- Perfect for All Ages: Kids and adults alike will enjoy these sweet, crunchy treats.
- Great for Gifting: Packaged in cute Easter baskets or boxes, they make for charming, homemade gifts.
- Versatile Occasion Treat: Beyond Easter, these cookies are a delightful dessert for any chocolate lover’s celebration.
Ingredients You’ll Need
Gathering the right ingredients is a breeze with this recipe. Each one plays a crucial role in bringing the Chocolate Covered Easter Oreos to life by balancing flavor, texture, and visual appeal.
- Oreos: Classic chocolate sandwich cookies are the base, delivering that familiar crunch and cream.
- Melting Chocolate: Use white, milk, or dark chocolate melts for coating; colored candy melts add a festive touch.
- Sprinkles or Edible Decorations: Choose pastel-colored or Easter-themed sprinkles to elevate the look.
- Vegetable Oil or Coconut Oil: Adding a small amount (optional) helps to thin the melted chocolate for a smooth finish.
- Wax Paper or Parchment Paper: Perfect for setting the dipped Oreos without sticking.
Variations for Chocolate Covered Easter Oreos
Feel free to get creative with your Chocolate Covered Easter Oreos by tweaking ingredients or adding fun extras. These variations are simple and let you experiment based on what you love or have on hand.
- Double Chocolate: Dip the Oreos in dark chocolate and drizzle white chocolate for a beautiful contrast.
- Peanut Butter Twist: Add a peanut butter drizzle or sprinkle chopped peanuts for a nutty upgrade.
- Vegan-Friendly: Use dairy-free chocolate melts and vegan Oreos to keep it plant-based.
- Nut Allergies: Skip nuts and focus on colorful sprinkles or mini candy eggs instead.
- Mini Oreos: Make bite-sized versions perfect for party platters or snack trays.

How to Make Chocolate Covered Easter Oreos
Step 1: Prepare Your Workspace
Line a baking sheet with wax or parchment paper to place the dipped Oreos as they set, making cleanup a breeze and preventing sticking.
Step 2: Melt the Chocolate
In a microwave-safe bowl, melt your choice of chocolate chips or candy melts in 30-second increments, stirring well between each until smooth and creamy. Adding a teaspoon of vegetable or coconut oil helps achieve a silky texture that’s easier to coat with.
Step 3: Dip the Oreos
Using a fork or dipping tool, fully coat each Oreo in the melted chocolate. Gently tap off any excess to avoid thick clumps and then place them on the prepared sheet.
Step 4: Decorate Immediately
Before the chocolate sets, sprinkle your Easter-themed decorations generously. This step locks in the festive look and adds an extra layer of sweetness and crunch.
Step 5: Let Them Set
Allow the coated Oreos to cool at room temperature or speed up the process in the refrigerator for 15-20 minutes until the chocolate hardens completely.
Pro Tips for Making Chocolate Covered Easter Oreos
- Choose Quality Chocolate: Using high-quality melts makes for a smoother coat and better flavor.
- Don’t Overheat Chocolate: Gently melt in short bursts to avoid seizing and clumping.
- Work Quickly: Decorate before the chocolate hardens to ensure your toppings stick perfectly.
- Use a Cooling Rack: Place dipped Oreos on a rack for even setting if you want minimal chocolate build-up on the bottom.
- Store Properly: Keep the finished treats in an airtight container to maintain freshness and crunch.
How to Serve Chocolate Covered Easter Oreos
Garnishes
Beyond sprinkles, try edible glitter, mini marshmallows, or pastel-colored sugar crystals to create a festive look that delights both the eyes and the palate.
Side Dishes
Pair these chocolate delights with fresh fruit like strawberries or a glass of cold milk for a balanced treat experience that pleases everyone.
Creative Ways to Present
Arrange the Chocolate Covered Easter Oreos in colorful Easter baskets or clear cellophane bags tied with ribbons, turning your homemade treats into beautiful gifts or table centerpieces.
Make Ahead and Storage
Storing Leftovers
Keep your Chocolate Covered Easter Oreos in an airtight container at room temperature or in the fridge for up to a week to maintain that perfect crisp and chocolate coating.
Freezing
Place Oreos in a single layer on a cookie sheet and freeze. Once solid, transfer them to a freezer-safe bag to enjoy for up to 2 months, thawing briefly before serving.
Reheating
Since these are best served at room temperature, just take them out of the fridge or freezer and let sit for a few minutes to soften the chocolate slightly before diving in.
FAQs
Can I use different types of Oreos for this recipe?
Absolutely! Classic Oreos work best, but you can experiment with flavored Oreos like mint or birthday cake for unique twists on your Chocolate Covered Easter Oreos.
What if I don’t have candy melts?
You can use regular chocolate chips for melting, just be sure to add a bit of oil and melt gently to get the right consistency for dipping.
How do I prevent the chocolate from cracking once hardened?
A thin, even coating and adding a small amount of oil to the melted chocolate helps keep the coating smooth and less prone to cracking.
Can I make these ahead of time for parties?
Yes! They store well for several days if kept in an airtight container and make a fantastic make-ahead treat for gatherings or gifting.
Are these suitable for kids to make?
Definitely! The dipping and decorating steps are fun and easy for children to participate in, making Chocolate Covered Easter Oreos a great family activity.
Final Thoughts
Chocolate Covered Easter Oreos are one of those magical recipes that capture the joy of Easter and the simple pleasure of chocolate in every bite. They’re easy to make, customized however you like, and absolutely irresistible. So roll up your sleeves, gather your favorite toppings, and whip up a batch to share the sweetness with everyone you love!
Related Posts
- How to Bake the Perfect Strawberry Lemon Cake
- How to Make Irresistible Tiramisu Cupcakes
- Easy Strawberry Shortcake Trifles to Delight
Chocolate Covered Easter Oreos
Chocolate Covered Easter Oreos are a festive and delicious treat combining classic chocolate sandwich cookies with creamy melted chocolate and colorful Easter-themed decorations. Perfect for parties, gifting, or indulging your chocolate cravings, these easy-to-make treats can be customized with various chocolate types and toppings to suit any celebration.
- Total Time: 20 minutes plus chilling time
- Yield: 20-30 Oreos
Ingredients
Cookies
- Classic Oreos (quantity as desired, typically 20-30 cookies)
Chocolate Coating
- White, milk, or dark chocolate melts (about 12 oz)
- Vegetable oil or coconut oil (1 teaspoon, optional for thinning chocolate)
Decorations
- Pastel-colored or Easter-themed sprinkles (quantity as desired)
- Optional: edible glitter, mini marshmallows, pastel sugar crystals
Tools
- Wax paper or parchment paper (for setting cookies)
Instructions
- Prepare Your Workspace: Line a baking sheet with wax paper or parchment paper to place the dipped Oreos as they set, making cleanup easier and preventing sticking.
- Melt the Chocolate: In a microwave-safe bowl, melt your choice of chocolate chips or candy melts in 30-second increments, stirring well between each until smooth and creamy. Add a teaspoon of vegetable or coconut oil if desired to achieve a silky texture that is easier for coating.
- Dip the Oreos: Using a fork or dipping tool, fully coat each Oreo in the melted chocolate. Gently tap off any excess chocolate to avoid thick clumps and place the coated Oreos on the prepared baking sheet.
- Decorate Immediately: Before the chocolate sets, generously sprinkle Easter-themed decorations onto each coated Oreo. This ensures the toppings stick well and adds visual appeal.
- Let Them Set: Allow the chocolate-coated Oreos to cool and harden at room temperature, or place them in the refrigerator for 15-20 minutes until the chocolate is completely set and firm.
Notes
- Use high-quality chocolate melts for smoother coating and better flavor.
- Melt chocolate gently in short increments to avoid overheating or seizing.
- Decorate quickly before the chocolate hardens to ensure decorations stick properly.
- Place dipped Oreos on a cooling rack for more even chocolate setting and minimal build-up on the bottom.
- Store finished treats in an airtight container at room temperature or in the fridge to maintain freshness and crunch.
- Prep Time: 10 minutes
- Cook Time: 10 minutes
- Category: Appetizers
- Method: No-Bake / Dipping
- Cuisine: American
- Diet: Vegetarian
Nutrition
- Serving Size: 1 cookie
- Calories: 150
- Sugar: 14g
- Sodium: 90mg
- Fat: 9g
- Saturated Fat: 5g
- Unsaturated Fat: 3g
- Trans Fat: 0g
- Carbohydrates: 18g
- Fiber: 1g
- Protein: 1g
- Cholesterol: 0mg
Keywords: Chocolate Covered Oreos, Easter Treats, Festive Desserts, Holiday Cookies, Easy No-Bake Dessert