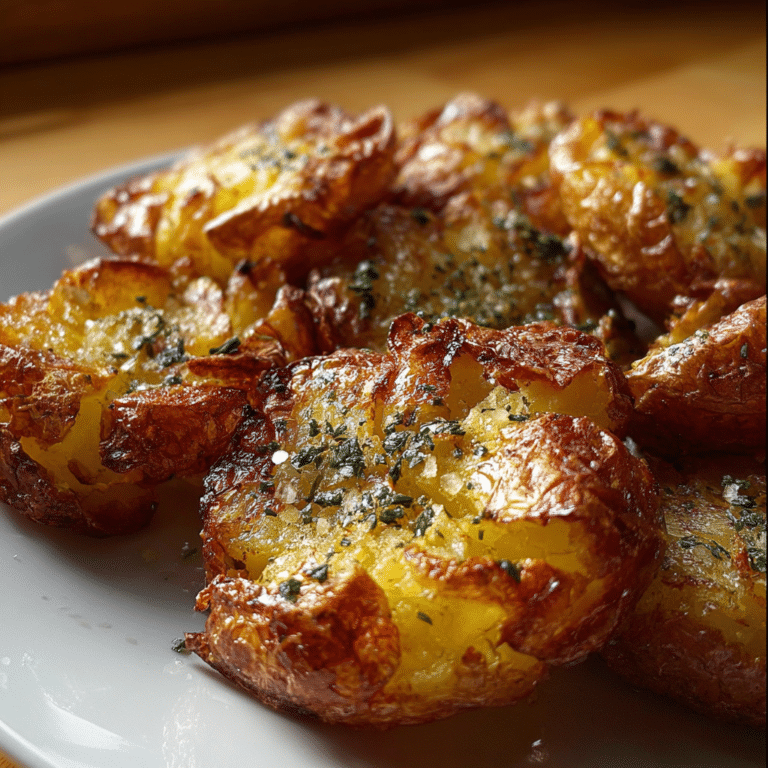
Light & Crispy Japanese Chicken Tempura

If you’ve ever dreamed of mastering a dish that delivers an irresistible crunch paired with tender, juicy chicken, then you’re in for a treat. This guide to making Light & Crispy Japanese Chicken Tempura reveals the secret to achieving a perfectly crunchy batter that’s quick to whip up and incredibly delicious. Whether you’re new to tempura or a longtime fan, this recipe brings the classic Japanese experience straight to your kitchen with a simple yet foolproof method that anyone can follow.
Why You’ll Love This Recipe
- Delightfully Crunchy Texture: The batter creates an ultra-light crust that stays crisp long after frying, preventing sogginess.
- Simple Ingredients: Uses an everyday pantry selection, making it easy to gather everything without a special trip.
- Quick Preparation: Ready in under 30 minutes, perfect for busy weeknights or unexpected guests.
- Customizable Flavors: Easy to add your favorite spices or dipping sauces for a personal touch.
- Authentic Japanese Taste: Captures the essence of traditional tempura with a home-cook friendly approach.
Ingredients You’ll Need
Each ingredient in this Light & Crispy Japanese Chicken Tempura recipe plays an essential role — from the light batter that ensures crunch to the fresh chicken pieces that remain tender and juicy. Gather these simple items to get started on the perfect tempura.
- Chicken Thighs: Choose boneless, skinless pieces for juicy, flavorful results that stay tender when fried.
- Ice-Cold Water: Helps keep the batter cold, which is key to achieving a crispy texture.
- All-Purpose Flour: Forms the base of the batter, creating a light coating that crisps perfectly.
- Cornstarch: Adds extra crunch by reducing gluten formation in the batter.
- Egg: Binds the batter ingredients together without heavyening the coating.
- Baking Powder: A tiny lift to the batter, keeping it airy and light.
- Vegetable Oil: For deep frying at the ideal temperature to seal in moisture and crisp the coating.
- Salt and Pepper: Basic seasoning to enhance the natural flavor of the chicken.
Variations for Light & Crispy Japanese Chicken Tempura
Feel free to make this recipe your own! The beauty of tempura is how versatile it can be, allowing you to switch up ingredients to fit your dietary needs or flavor desires. Here are some fun twists to explore.
- Spicy Kick: Add a pinch of cayenne pepper or chili powder to the batter for a subtle heat that wakes up your taste buds.
- Gluten-Free Option: Substitute rice flour or a gluten-free all-purpose blend to enjoy tempura without gluten.
- Herb-Infused Batter: Mix in finely chopped shiso or parsley for an aromatic spin.
- Vegetable Mix-In: Swap chicken for seasonal veggies like sweet potato, bell peppers, or zucchini for a fresh take.
- Low-Oil Frying: Use an air fryer to get a crispy texture with less oil and fewer calories.

How to Make Light & Crispy Japanese Chicken Tempura
Step 1: Prepare the Chicken
Start by cutting your boneless, skinless chicken thighs into bite-sized strips or chunks. Pat them dry with paper towels to remove any excess moisture, which helps the batter stick better and prevents sogginess when you fry.
Step 2: Make the Batter
In a mixing bowl, gently combine ice-cold water and lightly beaten egg. In a separate bowl, whisk together the all-purpose flour, cornstarch, baking powder, and a pinch of salt. Slowly add the dry ingredients to the wet mix, stirring just enough to combine — small lumps are okay to keep the batter light and airy.
Step 3: Heat the Oil
Fill a deep pan or pot with vegetable oil to a depth of about 2 to 3 inches. Heat it to a steady 350°F (175°C) — use a cooking thermometer to check. Oil at the right temperature is crucial; too cool and your tempura will absorb oil, too hot and it will burn instantly.
Step 4: Coat and Fry Chicken
Dip each piece of chicken into the batter, making sure it’s fully coated but not overloaded. Carefully place the pieces into the hot oil without crowding the pan. Fry in batches, turning occasionally, until the tempura turns golden and crisp, about 4 to 5 minutes per batch.
Step 5: Drain and Serve
Use a slotted spoon to remove the chicken from the oil and place it on a wire rack or paper towels to drain excess oil. Serve immediately while still hot and crunchy for the best experience.
Pro Tips for Making Light & Crispy Japanese Chicken Tempura
- Use Ice-Cold Water: Cooler batter prevents gluten formation, resulting in a lighter, crisper coating.
- Don’t Overmix Batter: Stir until just combined with some lumps to maintain airiness.
- Keep Oil Temperature Steady: Use a thermometer and adjust heat as needed to maintain 350°F (175°C).
- Fry in Small Batches: Avoid overcrowding to keep oil temperature stable and coating crispy.
- Serve Right Away: Tempura tastes best fresh to enjoy its signature crunch without sogginess.
How to Serve Light & Crispy Japanese Chicken Tempura
Garnishes
Sprinkle freshly chopped green onions or a dash of toasted sesame seeds on top to add bursts of color and texture that complement the crisp tempura.
Side Dishes
Pair your tempura with steamed rice, pickled ginger, or a simple dipping sauce made of soy sauce, grated daikon radish, and a little lemon for a balanced and refreshing meal.
Creative Ways to Present
Serve tempura on a bamboo mat or wooden platter lined with parchment paper for a stylish, authentic touch that elevates your home dining experience.
Make Ahead and Storage
Storing Leftovers
Place leftover tempura in an airtight container lined with paper towels to absorb moisture, and refrigerate for up to 2 days. Note that the crispiness will diminish over time.
Freezing
Freeze tempura pieces in a single layer on a baking sheet until solid, then transfer to a sealable bag. This helps keep them from sticking together and preserves freshness for up to 1 month.
Reheating
Reheat frozen or refrigerated tempura in an oven or air fryer at 350°F (175°C) for 5-7 minutes to revive crispiness, avoiding the microwave which can cause sogginess.
FAQs
What makes tempura batter light and crispy?
Using ice-cold water and minimal mixing creates a batter that’s light by limiting gluten development, while cornstarch and baking powder add crispiness and lightness.
Can I use chicken breast instead of thighs?
Yes, but thighs tend to stay juicier and more flavorful after frying, while breast meat can dry out faster.
Is it necessary to deep fry the tempura?
Traditional tempura is deep fried for maximum crispness, but you can use an air fryer for a healthier alternative, though the texture may be slightly different.
How do I prevent the batter from sticking too much to my hands or whisk?
Dipping your hands in cold water before handling batter or using chopsticks/spoons for mixing and coating helps prevent sticking.
What are good dipping sauces to serve with this tempura?
Classic tentsuyu sauce made from soy sauce, mirin, dashi, and grated daikon pairs excellently, or a simple soy-sesame dip works well too.
Final Thoughts
Now that you have the full scoop on creating irresistibly light and crunchy pieces of Japanese chicken tempura, it’s time to bring this delightful dish to your kitchen table. With minimal fuss, everyday ingredients, and pro tips to guide you, you’ll impress yourself and anyone lucky enough to dig in. So roll up your sleeves and enjoy every crispy, tender bite of your homemade Light & Crispy Japanese Chicken Tempura!
Related Posts
- Ground Beef And Broccoli Fried
- Air Fryer Parmesan Crusted Chicken with Mayo
- Delicious Baked Cajun Salmon

Light & Crispy Japanese Chicken Tempura
Master the art of Light & Crispy Japanese Chicken Tempura with this easy, quick recipe that delivers a perfect balance of crunchy batter and tender, juicy chicken. Made with simple pantry ingredients and a foolproof method, this authentic tempura is ideal for any occasion and can be customized to your taste.
- Total Time: 25 minutes
- Yield: 4 servings
Ingredients
Main Ingredients
- Chicken Thighs, boneless and skinless – 1 pound
- Ice-Cold Water – 3/4 cup
- All-Purpose Flour – 3/4 cup
- Cornstarch – 1/4 cup
- Egg – 1 large, lightly beaten
- Baking Powder – 1/2 teaspoon
- Vegetable Oil – for deep frying (about 4 cups)
- Salt – 1/2 teaspoon, plus extra for seasoning
- Pepper – 1/4 teaspoon, plus extra for seasoning
Instructions
- Prepare the Chicken: Cut boneless, skinless chicken thighs into bite-sized strips or chunks. Pat dry thoroughly with paper towels to remove excess moisture, which ensures the batter adheres well and prevents sogginess.
- Make the Batter: In a mixing bowl, gently combine ice-cold water and lightly beaten egg. In a separate bowl, whisk together all-purpose flour, cornstarch, baking powder, and a pinch of salt. Slowly add the dry ingredients to the wet mix, stirring just enough to blend; small lumps are desirable to keep the batter light and airy.
- Heat the Oil: Pour vegetable oil into a deep pan or pot to about 2–3 inches depth. Heat steadily to 350°F (175°C) using a cooking thermometer to maintain the temperature. Proper oil heat is essential to prevent oily or burnt tempura.
- Coat and Fry Chicken: Dip each chicken piece into the batter, coating fully without overloading. Carefully place pieces into the hot oil in batches, avoiding overcrowding. Fry for 4–5 minutes, turning occasionally, until golden and crisp.
- Drain and Serve: Remove fried chicken using a slotted spoon and place on a wire rack or paper towels to drain excess oil. Serve immediately while hot and crunchy for optimal texture.
Notes
- Use ice-cold water to keep the batter temperature low, minimizing gluten formation for a light, crisp coating.
- Do not overmix the batter; stir just enough to combine with some lumps intact to maintain airiness.
- Maintain oil temperature at 350°F (175°C) using a thermometer to ensure proper frying.
- Fry chicken in small batches to prevent oil temperature from dropping, keeping the batter crispy.
- Serve the tempura immediately after frying to enjoy its signature crunch.
- Prep Time: 10 minutes
- Cook Time: 15 minutes
- Category: Appetizers
- Method: Deep Frying
- Cuisine: Japanese
- Diet: Gluten Free (with substitutions)
Nutrition
- Serving Size: 1 serving (about 4-5 pieces)
- Calories: 320
- Sugar: 0.5 g
- Sodium: 450 mg
- Fat: 20 g
- Saturated Fat: 3 g
- Unsaturated Fat: 17 g
- Trans Fat: 0 g
- Carbohydrates: 18 g
- Fiber: 1 g
- Protein: 22 g
- Cholesterol: 75 mg
Keywords: Japanese chicken tempura, crispy chicken, tempura recipe, Japanese appetizer, fried chicken, crunchy batter, quick tempura, authentic tempura